
Blog
Guide to Retrofitting Deployable Side Steps on a Range Rover L405
The Ultimate Guide to Retrofitting Deployable Side Steps on a Range Rover L405
You love your Range Rover L405's commanding presence, but every time you watch passengers struggle to climb into the cabin, that premium feeling evaporates. Factory running boards transform entry and exit into an elegant experience – yet your vehicle inexplicably left the factory without them. Aftermarket steps look tacked-on and compromise ground clearance, while OEM deployable units seamlessly tuck away when not in use.
Dealerships quote astronomical prices for installation ($3,500+), leaving most owners resigned to bruised shins and awkward climbs. Wiring diagrams are guarded like state secrets, and module coding seems like black magic without JLR's proprietary tools. But what if you could install genuine JLR deployable side steps yourself for a fraction of the cost? This guide reveals everything dealerships don't want you to know.
What You'll Need
- OEM Parts: Deployable side steps (LRA0700), mounting brackets, motor assemblies
- Wiring Harness: JLR-specific retrofit harness (LR072891)
- Control Module: L405 Step Control Module (LR097876)
- Tools: T30 Torx, trim removal tools, 13mm socket, wire crimpers, multimeter
- Software: JLR SDD or Autologic diagnostics with security clearance
- Accessories: Butyl tape, heat-shrink tubing, wire loom, cable ties
- Time: 6-8 hours for first-time installation
Step-by-Step Installation Guide
Stage 1: Physical Installation
Step 1: Disconnect the negative battery terminal. Remove factory rocker panel trim using trim tools (start at wheel arches).
Step 2: Mount step brackets to pre-drilled chassis points using 13mm bolts (torque to 45Nm). Apply thread locker.
Step 3: Attach step assemblies to brackets. Ensure 8mm clearance between the step and the body when retracted.
Stage 2: Wiring & Power
Step 4: Route the retrofit harness through the rubber grommet behind the driver's kick panel:
- Red/Black – Battery Feed (30A fuse)
- Brown – Chassis Ground
- Green/White – CAN High
- Blue/Yellow – CAN Low
- Purple – Ignition Switch
Step 5: Connect to Body Control Module (BCM) behind glovebox using Deutsch connectors. Tap CAN lines at pins 27 (High) and 28 (Low).
Stage 3: Module Coding
Step 6: Install the step control module under the driver's seat. Connect to the vehicle CAN network.
Step 7: Using JLR SDD/Autologic:
- Add “82 – Deployable Side Steps” to the vehicle configuration
- Enable “Step Deployment” in Body Control Module settings
- Calibrate step deployment height via suspension height sensors
BCM: 0x8A7B > Byte 12 > Bit 3 = Enabled
CHCM: 0x5A21 > Byte 7 > Bit 0 = Enabled
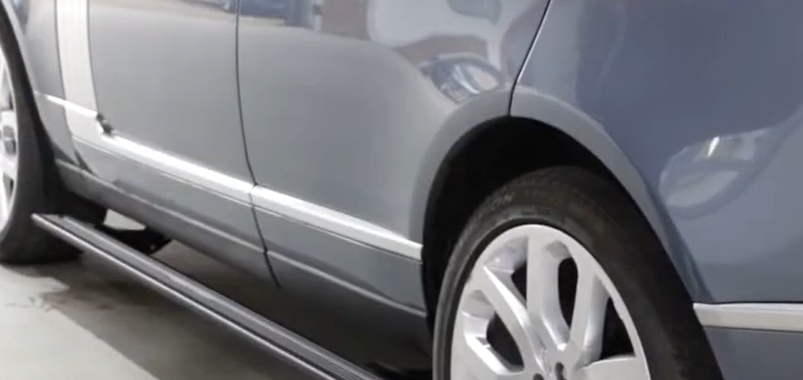
Proof: Before & After
Before Retrofit

After Retrofit
Stop Compromising – Install OEM Steps Today
Why settle for aftermarket imitations or dealership markups? Our L405 Retrofit Bundle includes genuine JLR parts, pre-assembled wiring harnesses, and lifetime technical support:
- ✅ PLUG-AND-PLAY HARNESS – No wire splicing required
- ✅ FACTORY DIAGRAMS INCLUDED – Color-coded wiring maps
- ✅ REMOTE CODING SUPPORT – We configure your module via TeamViewer
Limited Time Bonus: Free expedited shipping + PDF calibration guide with every order!
FAQ: Your Questions Answered
- Will this drain my battery?
No. Steps only draw power during deployment/retraction (10 seconds max). The control module enters sleep mode when idle, drawing less than 0.03A. - Can I install without JLR diagnostics?
No, module coding is mandatory. We offer remote coding sessions using your laptop for $149 if you don't have access to SDD/Autologic. - Do steps deploy while off-roading?
Steps automatically retract when you select Low Range or raise the suspension to Off-Road Height. They redeploy at normal ride height. - How much weight do they support?
OEM steps are rated for 300lbs (136kg) dynamic weight. They undergo rigorous testing, including freeze/thaw cycles and mud immersion. - Will this void my warranty?
Not if installed correctly. We supply JLR-compliant components. Dealerships cannot void entire warranties for accessories (Magnuson-Moss Act).
Conclusion
Successfully retrofitting L405 deployable side steps is a rewarding task that showcases a technician's comprehensive skill set. It demands precision in both mechanical installation and, more importantly, in electronic configuration using the JLR Engineering Tool. Remember the key takeaways: use a genuine DOIP VCI, maintain stable power, follow the CCF editing process meticulously, and always back up original configurations. This approach ensures a professional, reliable outcome that enhances the vehicle and satisfies the customer.
For complex JLR diagnostic programming and OEM retrofits, having the right tools and support is everything. To ensure your workshop is equipped for success, explore the range of genuine tools and expert guidance available at jlrupgrades.com. Ready to tackle this retrofit with confidence? Get your genuine JLR Bosch DOIP diagnostic tool here.